How to Drill into Concrete like a Pro

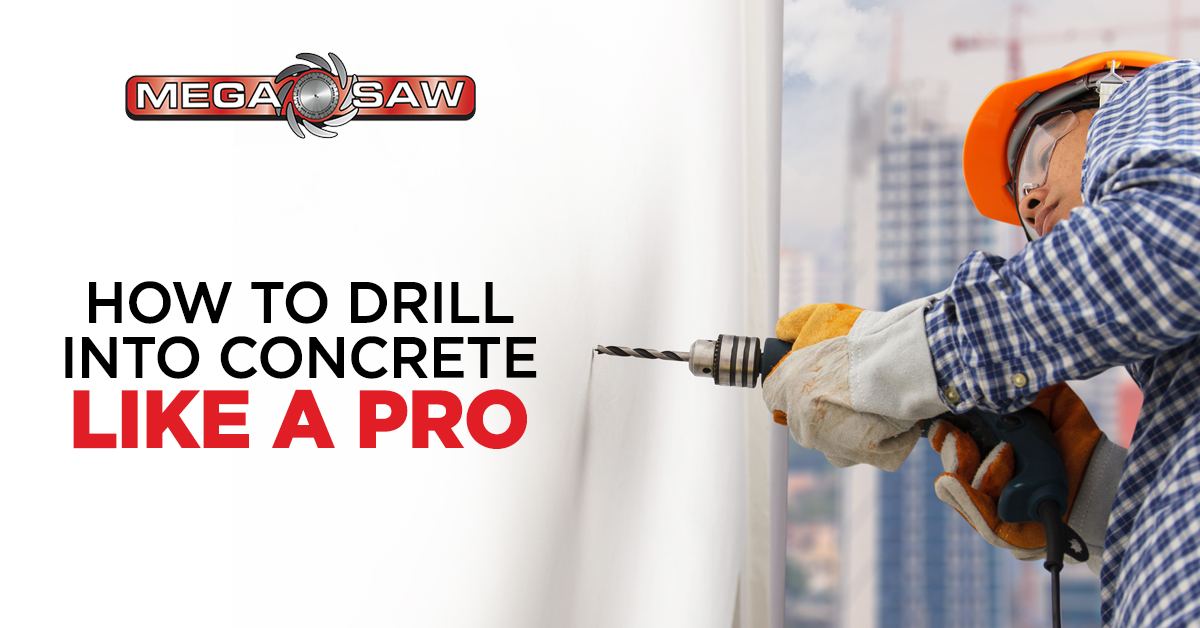
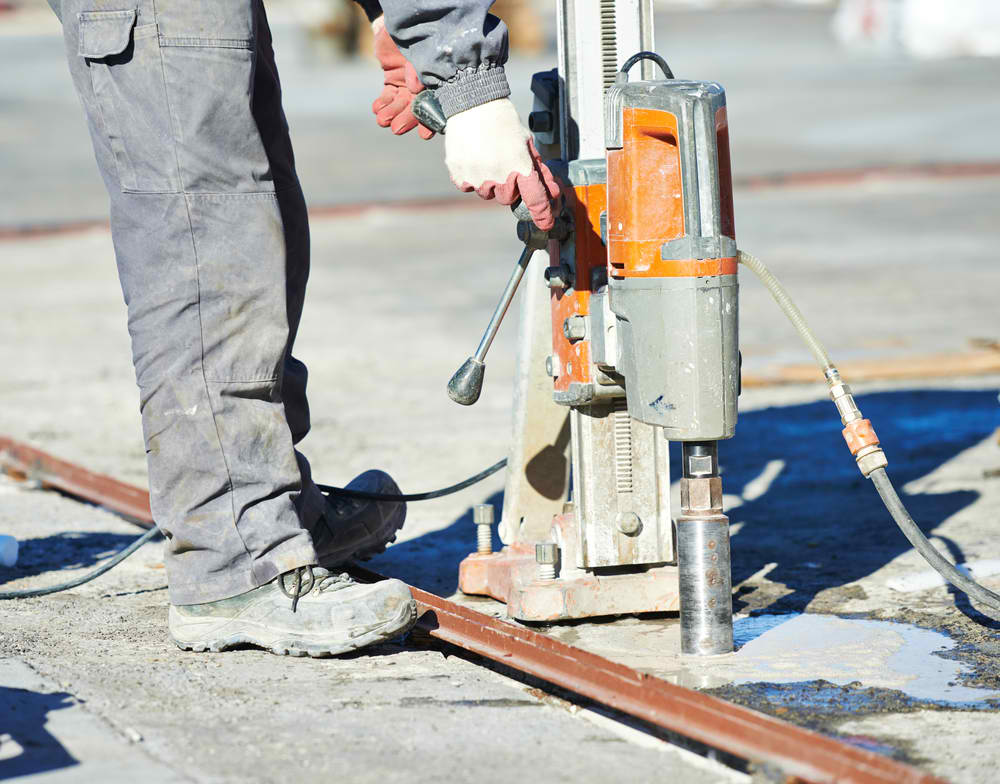
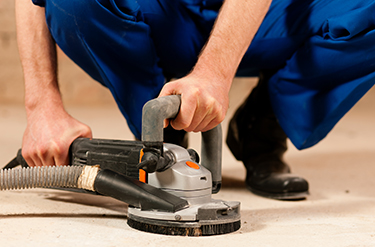
Knowing how to drill a hole in concrete comes in handy. With it you can drill holes into your wall, you will be able to put up shelves, hand paintings and install lights with little trouble.

megasaw
Concrete Drilling Melbourne

Contact us today or CALL 1300 920 419 for more info.

Topics You Might Like:

The good news is – you don’t have to be a pro to drill holes in a concrete floor or even the ceiling.

Before we start with the step by step process, it’s important to keep two things in mind;
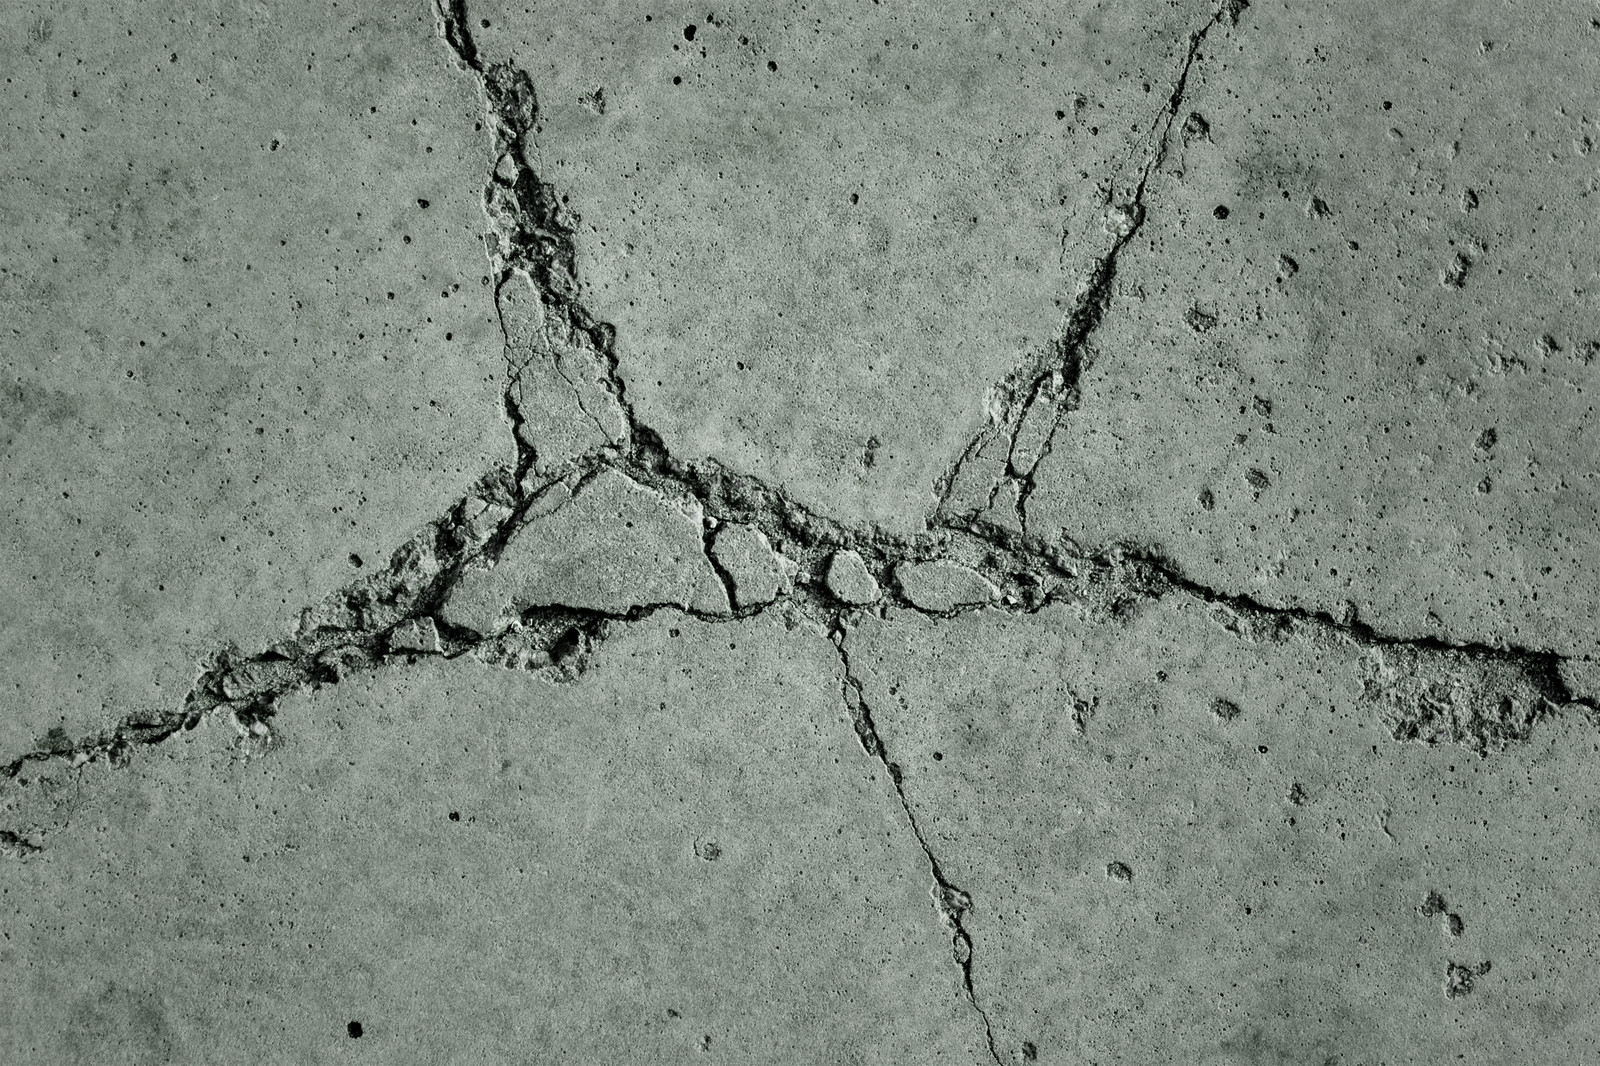
Concrete is tough

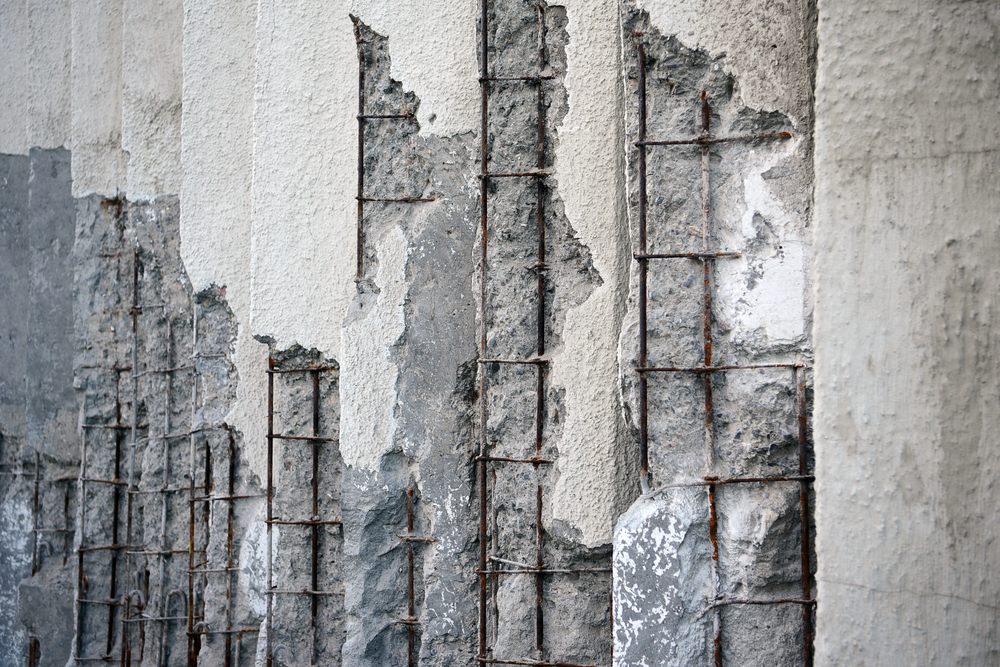
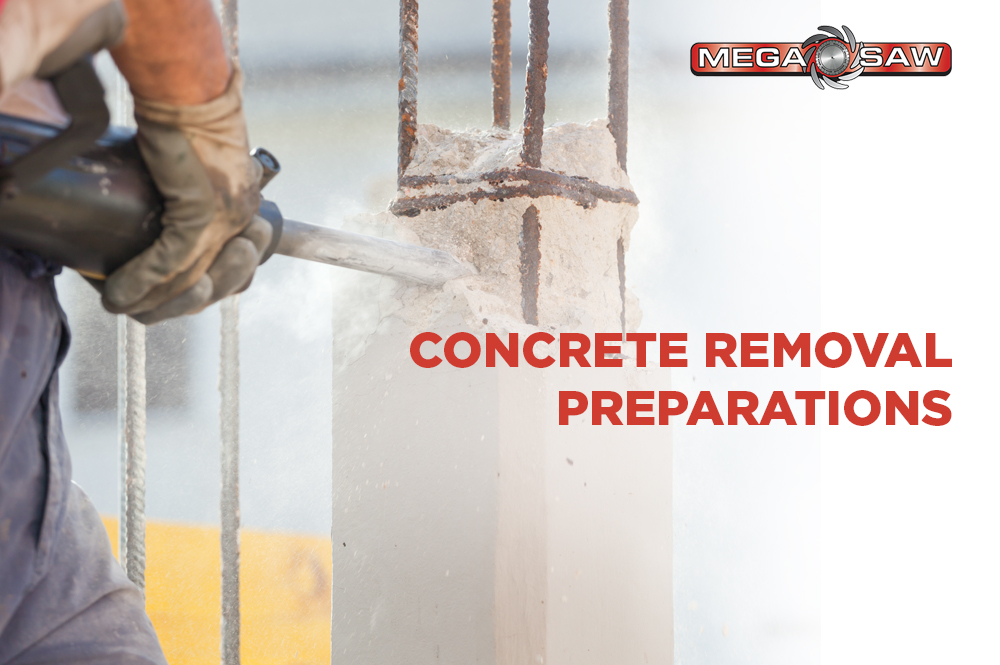
Created by mixing different elements including sand, gravel, and crushed stone that are then bonded together using cement, concrete surfaces can be as hard as stone.

Even if you’ve managed to drill holes in brick walls before, this will be a completely different task.

Safety is key

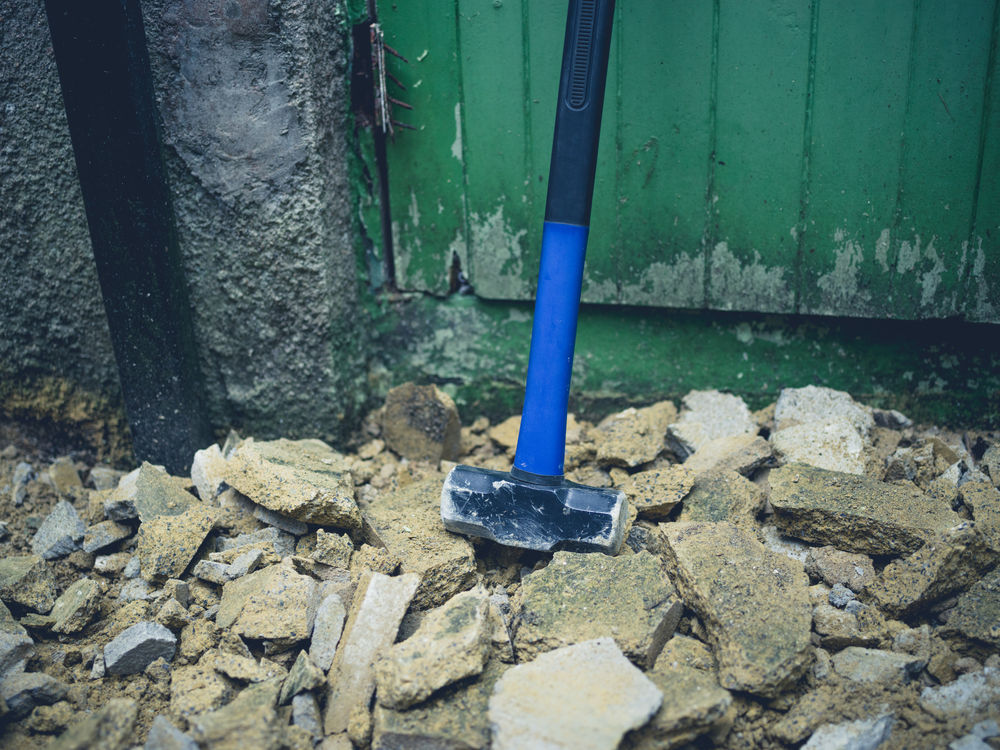
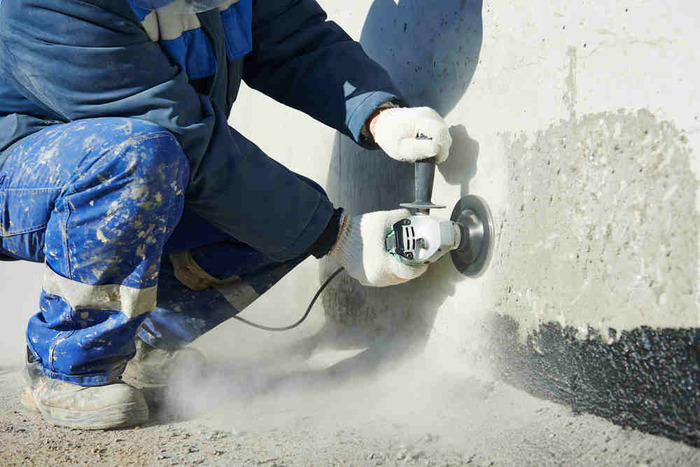
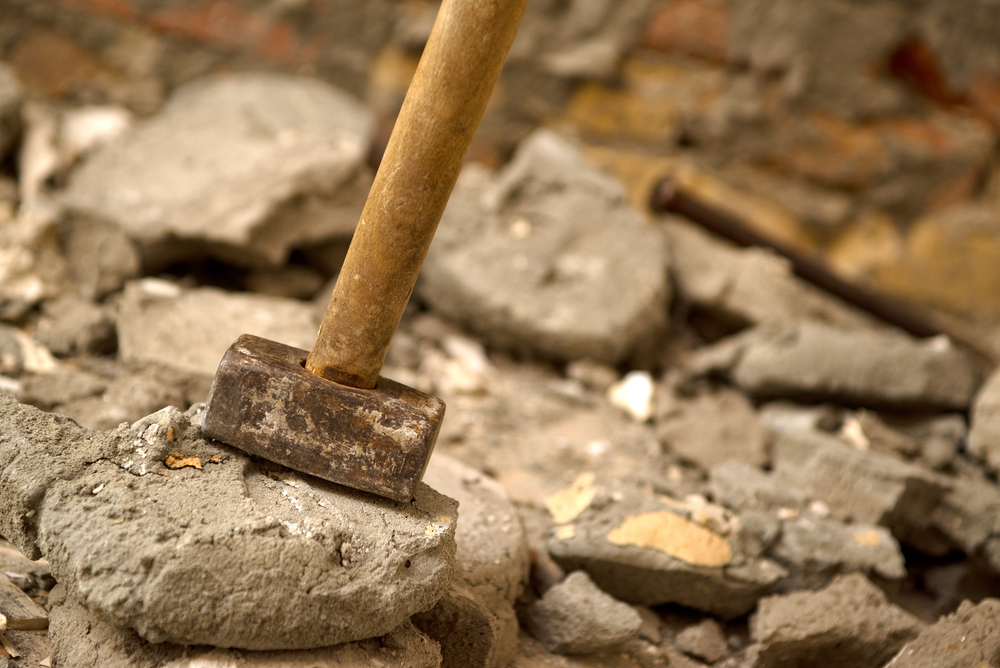
Being a very hard material, You need to be ultra careful when drilling through a concrete wall. That’s why using a hammer and sharp object is a no-no. The debris coming off the surface could get into your eyes which can be traumatic.

That’s why safety goggles are recommended. If you suspect that there could be a lot of dust, you may also want to wear a dust mask. Ear protection may also be necessary as drilling job tend to be very noisy.

Step by Step Process of Drilling Into Concrete

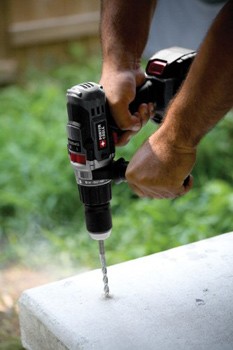
Step 1: Get the right drill

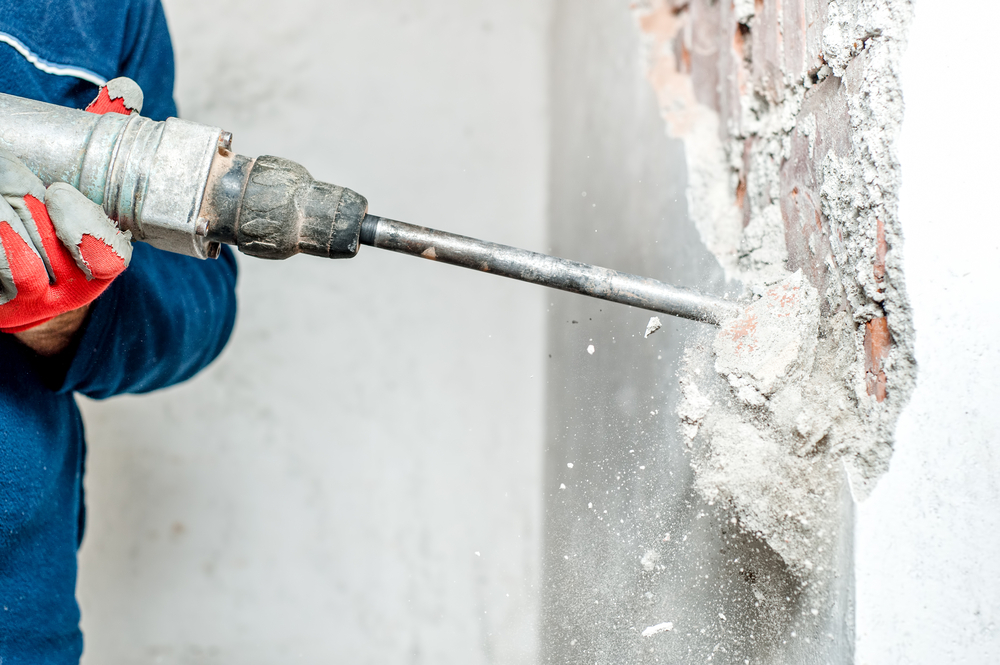
To put a hole in a concrete wall, you’ll need a drill. It has to either be a hammer drill or a rotary hammer drill. A standard drill might work or the drilling/rotation might not be enough to break the concrete.

concrete drilling

Hammer drills work perfectly because it chisels away the concrete. Its rotary action can punch into the concrete. This double-action allows for faster drilling with minimal effort.

More importantly, the resulting hole is good.  This is in contrast to other drills that make holes that aren’t deep enough or off the mark.
Considering how important a hammer drill, here’s what to look for to get the right one: 

  1. Depth gauge
  2. Variable speed setting
  3. Good handle and grip

Step 2: Get the right drill bits

You need reliable drill bits to get  huge impact on the quality of the resulting hole.

Experts recommend the masonry bit. A masonry bit is specifically designed for rough jobs. The bit is made of stainless steel with the tip made from tungsten carbide to provide an even tougher cutting edge.

When connected to the drill, the hardened head continually bumps against the concrete surface, breaking it down.

The flutes of the drill will help push the masonry dust out and away from the hole. This is different from when using an ordinary drill, when you have to physically blow or push out the dust.

In terms of size, it depends on your project. Anything between 5 to 40 millimeters in diameter and about 39 inches in length will do the job well.

Step 3: Determine how big the hole should be

How big is the hole you need? And, how deep do you want it to be? This will also depend on your project.

A homeowner looking to hang a few art portraits on the wall won’t need overly large holes. The holes also don’t have to be very deep. If the portrait came with plugs, check the length of the plugs by placing the drill head beside the plug and measure the length.

Some machines have a depth setting or depth control bar wherein you can set the needed depth accordingly.

If your machine doesn’t have depth control, just mark the required depth with a pencil or masking tape. Then, attach the drill bit into the chuck and tighten.

Step 4: The Actual Drilling

concrete drilling

Start by marking on the wall where you want to drill. You can use a marker to mark a visible dot or an “X” sign on the spot.

Alternatively, use an old screw to make a dent on the spot. The screwdriver can also help you chip out a bit of concrete to give you the point of the drill when starting the drilling process.

With that done, place the head of the drill bit on the spot and start drilling. The rule of thumb is to start out slowly and maintain the right pressure. You can always increase the speed later. The pressure needs to be just firm enough to avoid slipping while allowing the drill to rotate freely.

Once the hole starts taking shape, you can increase the rotation speed and even apply more pressure. Since it’s concrete, don’t expect to be done within seconds. It will take time depending on the power of your drill and quality of masonry bits. Once you reach the required depth, stop the machine.

Know How to Troubleshoot

Sometimes drilling projects don’t go as smoothly as anticipated. Along the way, you might hit a beam which may be difficult to penetrate.

If this happens, insert a masonry nail into the hole and hammer. This can help break the concrete, making it easier for the drilling to proceed more smoothly.

If you can follow these steps, expect an easy time drilling. And to be more productive, choose the highly effective hammer drills and masonry bits from Megasaw.

Contact us today to learn more.

megasaw
Concrete Drilling Melbourne

Contact us today or CALL 1300 920 419 for more info.

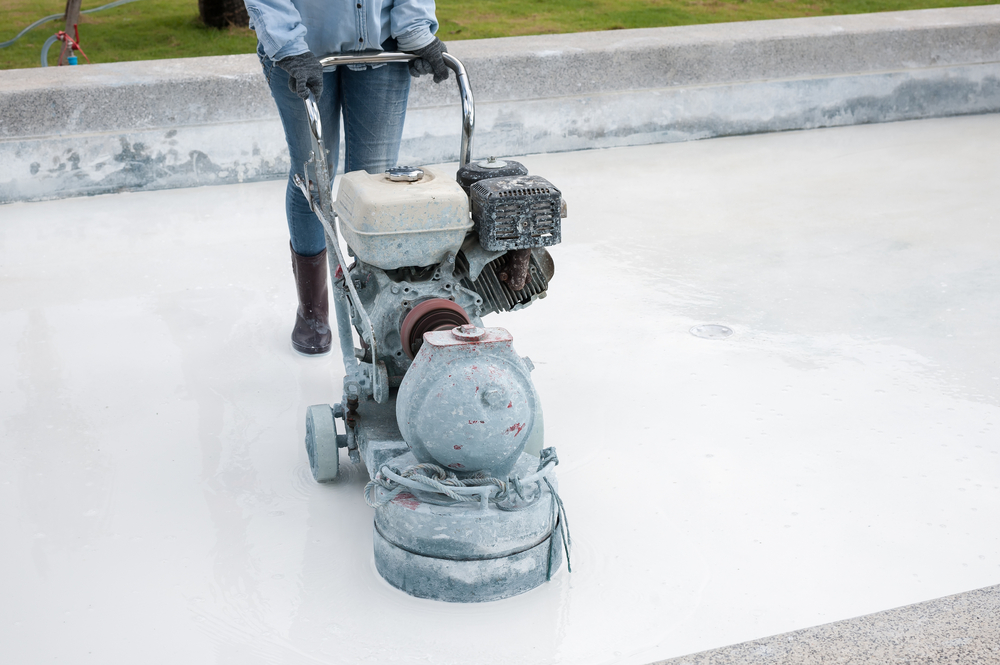
Megasaw has over 20 years of experience in the concrete cutting industry.We offer concrete sawing and concrete drilling services in Melbourne and across Victoria. We deal with both residential and commercial projects, and we use the latest tools for high quality construction work.

Topics You Might Like:

Work Safety Gear for Concrete Cutters and Drillers

How to Prevent Accidents at the Workplace

Concrete Drilling Basics and Overview

Most Common Concrete Drilling Hazards and Their Solutions


How Much Does Concrete Grinding Cost Per Square Metre

[expand title="READ MORE"] [/expand]
how to drill into concrete like pro

Know what factors affect the cost of concrete grinding so you could budget accordingly. The numerous steps to achieve a polished surface make it costly.

When thinking about floors in homes, most owners’ options are limited to  floorboards, laminates, and old-fashioned carpets. Recently, the stripped and treated floorboard was the most popular, with homeowners lining up at the stores to purchase them.

wooden slab

They might be a little rough, even noisy, but their versatility is unrivaled.  The boards are tough and give the home a stripped feel of a modern space.

In particular, a number of people are turning to polished concrete. It’s not only good, but also provides clean lines which help with under floor heating.

[expand title=”READ MORE”]

polished concrete

Under floor heating foregoes the need for expensive radiators and provides heat across the house instead of just n particular rooms and only a few corners.

During winter, the concrete floor will be warm in the underfoot. Yet during the summer, it will feel cool in the underfoot.

This gives you both worlds.

But the best thing is – concrete floors can last a very long time.

And you can always add colour to the mix when pouring the floor. You could even play around with the texture and introduce a few chips or sparkles.

[/expand]


Start with a Good Grind

Floor grinding refers to the process of evening out raised areas to make the floor level. A grinding machine is used for this.

A grinding machine can come in many configurations, the most common being the angle grinder. Then, there are also particularly designed grinders meant for special projects.

concrete grinding

This is because concrete is harder than most flooring materials such as marble and granite. As such, more power is needed to even out the surface. Concrete grinders are built exactly for this. They can withstand a greater degree of stress and have more power to cut away even the hardest bumps.

megasaw
Diamond Grinding Service

Contact us today or CALL 1300 920 419 for more info.

We offer professional & reliable diamond grinding service in Melbourne for 20+ years.
We provide best solutions and we use only the best equipment available.


The concrete grinding machines mostly use some sort of abrasive such as diamond or silicon tools to grind. Diamond tools used for grinding usually  are usually diamond grinding cup wheels. The machines come in a variety of sizes with quality of finishes determined by the grits in a machine.

RELATED:

Handy Tips for Diamond Grinding Services and Keeping Tools in Top Condition

Selecting The Right Concrete Grinding Equipment and Tools

Types and Uses of Hand-Held Concrete Grinding Tools and its Pros and Cons

Four Key Steps in Concrete Grinding and Polishing


grinding disk

Currently, you’ll find anything between six and thousand-grit concrete grinding machines – the higher the grit, the soother the finish. One thousand eight hundred -grit machines are considered the highest shine you can apply on a floor surface.

To be more  convenient, the grinding is usually done when the concrete is dry.

[expand title=”READ MORE”]

Why?

Because grinding when wet might require a lot of people. If you’re grinding when dry, you’ll need to use a filter-equipped vacuum to control dust emission.

The fine concrete dusts contain silica which can cause serious damage to the lungs. Inhaling the dust in large amounts has been proven to cause silicosis.

Wet grinding on the other hand, doesn’t require the vacuum machine. Learn the difference between dry and wet concrete grinding.

The actual grinding can be quite demanding.

But your contractor should clean up the mess and polish the floor. A degree of disruption to the home should be expected though it’s usually no more than you’d expect when laying any other floor surface. For safety reasons, keep the pets and kids away.

Once the floor has been poured and leveled, the grinding starts. There will be grinding of the surface as mentioned. Then a densifying material is added to the concrete and a final polish applied to produce a smooth clean final surface. With that done, all that is left is to give it a thorough mop to bring out the shininess.

RELATED:

Polishing Concrete like a Pro Even on a Budget

Four Key Steps in Concrete Grinding and Polishing

[/expand]


Approximate the potential cost

You’ve probably seen different sources with different quotes on the costs of concrete grinding.  For instance, one reliable source recently mentioned that you could have your concrete floor ground for as little as $2 per square foot which translates to about $21.5 per square metre.

Some have also mentioned $4 per square foot ($43 per square metre) as the minimum grinding cost.

planning potential cost

The truth is that you never really know how much the contractor will charge until they tell you the price. What you can do, however, is to try and approximate the potential cost.

The cost of concrete grinding is affected by five key factors;

  • Size of the floor

As you’d expect, the larger the floor, the less you’ll pay. This is due to the economies of scale. When determining the cost per square metre, the contractor will ask you to pay more for a small floor project (less than 50,000 square feet).

  • Design complexity

Complex projects generally have a higher cost because the technician has to invest more time in the job. A good example is saw cutting.

saw cutting

Saw cuts are highly specialised tasks that take a lot of time and energy and thus cost more. Other designs that might cost you more include stenciling, and installation of metal divider strips. However, the results will look amazing.

  • Current condition of the floor

Grinding a floor that requires a lot of prepping may also cost more per square meter. This is usually the case if the floor has a lot of patches.

Crack repairs, for example, can add as much as $43 per square metre to initial estimates.  Smoother floors with little surface preparation, on the other hand, won’t cost as much.

  • Above–Grade installations

Decorative floors installed on subfloors or raised decks need a cement underlayment before applying the final finish. This involves installing a series of products including a waterproof layer, a concrete overlay, and then a finishing before applying a sealing coat.

finished project

If your flooring contractor has to go through all these processes so that you would have an above-grade concrete floor, be prepared to pay between $43 and $65 more per square metre.


Wrap up

In a nutshell, you could end up spending  more than $100 per metre.

At Megasaw, quality concrete grinding is the name of the game. Aside from the competitive prices, our highly experienced company is also known for its cutting edge technology and customer-first approach, making it the go-to concrete cutter in the Melbourne and beyond.

Contact us today to get a quote.

megasaw
CONCRETE GRINDING SOLUTIONS

CONTACT US today or CALL 1300 920 419

Guide to Grinding A Concrete Floor

Grinding A Concrete Floor

Concrete grinding has become a popular activity in construction projects. But what exactly is it and how is concrete actually ground?

In the following section, we discuss the importance of grinding, what it entails, the tools used, safety precautions and everything else you may want to know about the process.

megasaw
Diamond Grinding Service

Contact us today or CALL 1300 920 419 for more info.

We offer professional & reliable diamond grinding service in Melbourne for 20+ years.
We provide best solutions and we use only the best equipment available.


What is Concrete Grinding?

Concrete grinding is the process of removing ridges, contaminants, and loose material from the subfloor surface using a special grinding machine. [expand title=”READ MORE”]

Concrete-Grinding.jpg

By removing the imperfections, you can lessen the overall cost in preparing the floor prior to covering. Plus, if you can achieve a smooth enough grind to allow carpet or vinyl to be laid on top, you won’t need to apply a cement-based skim coat. In addition, you can forego of the waiting time needed for the skim coat to dry.[/expand]


Types of Grinders

Grinders come in a variety of types and sizes. The choice you make will depend on the size of the job and the type of material you need to remove.

In corners and tight areas, hand held grinders should be used. These specialised grinders, unlike ordinary angle grinders, have a dust shroud and extraction hose. The user should utilise these attachments when there is a lot of dust being generated. [expand title=”READ MORE”]

Builder-worker-with-grinder-machine-cutting-finishing-concrete-wall-at-construction-site.jpg

For the main areas of the floor, walk-behind grinders are preferable. These grinders are driven by mains electricity – mostly 240 volts or sometimes 3-phase power. However, diesel, LP gas, petrol, and compressed air are sometimes used as fuel.

Grinder heads

Grinders can have single, double, or planetary head action. There are even four-head grinders commonly used in large projects.

  1. Single head grinders

A single head grinder has a central shaft that drives just one head. In smaller grinders, the head usually contains one disc measuring 250mm in diameter.

Larger machines can have multiple discs within the same head, some containing up to six discs with varying diameters. In machines with six discs, the diameter of each disc might even be smaller.

With so many discs working on the concrete surface, these grinders produce a very fine finish which explains why they’re mostly used in polishing rather than grinding.

Single-head grinders have a grinding width of approximately 550mm.

  1. Double-head grinders

Double-head grinders have two heads each capable of holding one or more discs. In some machines, the two headers rotate in the same direction.

This usually causes the machine to pull to one side which can make it difficult to pull across the floor. But you can at the same time take advantage of this characteristic when working on walls.

In other machines, the heads rotate in opposite directions to balance the torque and increase machine manoeuvrability. Double head grinders have a grinding width of between 750mm and 1,000mm.

  1. Planetary action grinds

In planetary header grinds, the header moves like a “planet” – independent of the grinding discs (or satellites) mounted onto it.

Planetary grinders are excellent surface preparation tools. The planetary head and the disc rotate in one direction which has the effect of increasing speed.

This usually results in more aggressive cuts especially where the diamonds (more on this shortly) are located closer to the outside of the head.  

Planetary grinders, thanks to their aggressive grinding, can also be used in concrete surface polishing. To achieve clean polishes, the discs are set to rotate counter-clockwise.

For concrete grinding, however, the discs must never be set to rotate counter-clockwise.  


RELATED:

Types and Uses of Hand-Held Concrete Grinding Tools and its Pros and Cons

Selecting The Right Concrete Grinding Equipment and Tools

Diamond Grinding Concrete Floors, Tools, Methods and Basic Tips

[/expand]


Diamond Tooling

Ultimately, the tool that usually comes into contact with the concrete surface is a set of diamond abrasives. Diamond is used because it is the hardest material on earth.

The abrasives are made by mixing synthetic diamond grit with a binding agent of metal or resin to create what is called a metal bond or a resin bond diamond segment. [expand title=”READ MORE”]

The smoothness of the grinding is determined by the fineness or coarseness of the diamond grits. Smaller grit sizes will produce a finer scratch pattern, increasing the life of the segment. Larger grit sizes, on the other hand, produce a rougher scratch pattern  

The life of the segment is also dependent on the strength of the bond. Hard bonds typically take longer to wear and expose the diamond grit. A softer surface, on the other hand, tends to wear away quickly.

The number of diamond segments found on each grinder header will also determine the quality of the finish. Where there are many grinders on the same header, the result is usually smoother.

Moreover, with a higher number of headers, the amount of work for each segment is reduced. This also reduces the load on the grinding machines.

For a finer finish, you can put some extra abrasive material such as sand or silicon carbide on the floor you’re working on. [/expand]


Safety in Concrete Grinding

Like most machines, concrete grinders are only safe if you use them correctly. This means you need to follow the manufacturer’s guide at all times. [expand title=”READ MORE”]

A few things to keep in mind include; before you start

  • Familiarise yourself with the equipment. Make sure you know how it works.

  • Check to ensure that the environment is safe. The place should be well lit, clear of clutter, and dry to avoid electric short circuits.

Megasaw-Img1.jpg

When setting up the machine

  • Wear appropriate safety gear. Don’t wear loose clothes that could be caught in the moving parts and wear closed boots.

Concrete-road-cutting-machine.jpg

  • You may also need gloves, safety glasses, and a hard hat depending on the job conditions.

When operating the machine

  • Listen for any strange noise or unusual vibrations. If something doesn’t feel right, turn off the machine immediately and troubleshoot the problem.

  • Maintain balance throughout the grinding process, with your hands firmly gripping the machine. Avoid awkward angles.

  • Your hands and feet must be kept away from moving parts at all times.

  • Stay alert.

Turning the machine off

  • Once you’re done, unplug the machine. For diesel o petrol powered machines, turn off the fuel line.

  • Inspect the machine for any damage before putting it away.

RELATED:

Work Safety Gear for Concrete Cutters and Drillers

How to Prevent Accidents at the Workplace

A Step By Step Approach in Concrete Cutting Leads to Greater Safety

[/expand]


Wrap up!

As you can see, the grinding process isn’t all bread and butter. You need the right tools and the right techniques for best results.

Megasaw can help you acquire the best machine and tools for the job. Contact us today to learn about the different grinders, diamond tools, grit sizes, and anything related to diamond grinding services.

megasaw
CONCRETE GRINDING SOLUTIONS

CONTACT US today or CALL 1300 920 419

Tools and Tips in Removing Concrete Slab

concrete slab removal

Breaking up concrete yourself might seem an impossible task, yet doing it yourself would save you a lot of money. You would not need to hire a removals company.

Begin with confidence that you don’t need any special skill to demolish and remove concrete slabs. All you need is some careful planning, the right tools, and some degree of caution.

Below is our guide to break up slabs into smaller pieces, cut through steel reinforcements and remove and dispose of the debris properly.

Concrete Removal and Demolition Service in Melbourne

Start by Evaluating Repair VS Complete Removal

It is best to remove concrete completely  when dealing with the following situations on your slab, sidewalk, patio, or driveway;

FROST HEAVE

This occurs when part of the concrete is pushed up because of frosting in colder regions.

MULTIPLE CRACKS

deep and wide cracks typically occur in extreme climatic conditions.

concrete cracks

SETTLED CONCRETE

Caused by improper preparation of the sub-grade.

In some cases though, repairing might be a great option. It entails less work and less expensive. The following are a few situations where repairing might be a wiser option;

THIN CRACKS

Small hairline cracks that don’t show any sign of settling can be easily repaired.

thin cracked

SUNKEN CONCRETE

Sunken parts of a concrete slab caused by heavy equipment that was placed on the slab can also be corrected through repair. 

Keep in mind that sometimes complete removal and replacement is better because of some persistent issues that still show up even after you repair the damage.

In this case, repair costs might start to pile. Hence it will be better to just remove and replace the concrete.

RELATED:


Get the right tools

If you hire a contractor, they will definitely come with more sophisticated tools. Two common tools contractors use are the Bobcat and the jack hammer.

The Bobcat is equipped with a hydraulic or pneumatic breaker attachment that helps to “thrash” the concrete. The contractor is also likely to bring a roll-off dumpster to haul away the broken concrete

Tools you should be looking at

Having a contractor that has these tools means you don’t have to buy them. You can always rent them for the project.  Instead, you can  focus on two smaller but very effective tools: the sledge hammer and the jack hammer.

THE SLEDGE HAMMER

This is your primary tool to remove the concrete. A few measured blows using a 12 lb. sledge hammer can crack most concrete slabs easily.
sledge hammer

This  works particularly well on narrow concrete slabs measuring four inches or less in thickness. You should be able to find one online for not more than $50.

THE JACHAMMER

Jackhammers are pneumatic hammers, meaning they are operated by air. They are heavier than sledge hammers, weighing about 90 lbs. But they are also more effective on thicker slabs.

concrete removal

Since jackhammers are also more expensive, you should consider renting rather than buying one outright.

Rental jackhammers come with an assortment of bits. You only need the chisel-point bit. It’s pointed head concentrates the hammer’s force on a small area, cracking the concrete faster than wider bits.

Additionally, don’t try to drill it into large pieces of concrete. Otherwise, the jackhammer will literally stick in the concrete. It will take a lot of time getting it out.

The idea is to move it no more than 2-3 inches into the slab and have a helper pry up with a long bar as you tear up the concrete.

Dealing with steel meshes and rebar

Many slabs contain a steel mesh reinforcement for it not to crack. These meshes can double or even triple the time it would take to crush the concrete slab.

This is why you should work on smaller pieces rather than big concrete pieces. On the smaller sections, you can cut the mesh with a bolt cutter.

For concrete slabs that contain rebar, use a reciprocating saw and metal blade or an angle grinder and metal cut-off wheel. 

A few more tips…

Plan for disposal

Concrete can’t go into a trash can. You’ll need a larger, stronger equipment to carry the pieces. Some concrete recycles usually pick it for free or charge a small fee, though you’re likely to pay additional fees if the concrete contains steel or mesh.
concrete removal

As for hauling, you can always count on a sturdy wheelbarrow to get you through. For this, use heavy-duty wheelbarrows or a powered one. Smaller ones would easily give in to the weight.

concrete removal

You’ll need more than one pair of hands

You need help with the lifting. Ideally, have a duo break up the concrete and two to four others haul the rubble away. If you can have more people, that’s better.

Safety first

Wear protective clothing to prevent rubble projectiles from cutting your skin and wear protective goggles. Also protect your ears with noise cancelling headphones.

RELATED:


Slab removal can save you money!

If you’re hesitant to remove the concrete on your own,  think of the potential savings.

Depending on where you live, basic removal can cost anywhere from $400 to $600 for a 200 square foot slab of recyclable concrete. The price usually goes up when it’s non-recyclable concrete.

A typical two-car concrete driveway costs between $1,500 and $2,500 to remove and a concrete foundation generally costs up to $5,000 to remove. And, that’s before you include disposal costs which can be between $100 and $500 depending on project.

If you need special equipment for the job, you may have to spend a few more hundred dollars. So, by the time you have even a basic slab removed by a contractor, you could end up spending more than $2,000.

If you do the job on your own, you can save a large chunk of that money, possibly up to $1,000 or more.


Final Thoughts

We at Megasaw are always willing to lend a helping hand. With decades of experience in the industry, we have helped many Australians in concrete removal and concrete cutting.

Our customer-focused staff and wide array of tools are exactly what you need to accomplish the job without any hassle. Contact us today and let’s see where we can chip in.


Things You Might Like To Read

Concrete Removal Techniques: Which Fits Your Needs?

Concrete Removal Techniques

People usually choose to remove concrete when it is damaged and needs to be replaced. But this should be done after all options to repair has been considered. Plus, look at the total cost – now and in the long run.

Think of just repairing the concrete, especially If it only has thin cracks   if it sunk. Tiny cracks can simply be filled up and concealed.

It is, however, beyond repair if you notice the following:

  • There are uneven, wide and deep cracks.

  • Incidences of frost heave. Sections of the concrete are pushed up by the ice that appears in frosty climates.

  • Settled concrete. This is a result of improper preparation of the sub-grade.

Further, you can consider concrete removal if you are changing your property layout, or  there are ongoing infrastructure improvements such as road widening in your locality.


Techniques in concrete removal

All concrete removal techniques are designed to reduce air and noise pollution. These include:   


  1. Dismantling

This is the most basic method.  When a homeowner uses a jackhammer or sledge hammer to demolish concrete and then haul away the rubble, this is dismantling.

jackhammer.png

In contrast, professional contractors however use concrete cutting tools and a crane to remove the rubble.

Dismantling has little noise, much reduced dust and produce limited damage to structures within the environment.

That’s why renowned Melbourne-based concrete cutting, drilling and sawing contractor Megasaw favours dismantling.

RELATED: Preparations in Removing Concrete


Here are some areas where you may utilise concrete saw cutting or robotic hammering.

Wire sawing – needed to remove the wire mesh used to reinforce concrete.

Wall sawing – most appropriate when you are renovating an office or  a house. This is done using the base of a concrete saw.

Flat drilling – suitable for cutting concrete from floors, pavements, bridge platforms or loading docks. A slab sawing attachment is used to make precise cuts by a series of up-and-down movements. This is designed to avoid broken cabling pipes, and other embedded material.


  1. Hydro demolition

Water can be used to cut concrete using a variety of devices – mainly robotic demolition equipment and handheld guns.

hydro_demolition.jpg

This technique is more appropriate to use in cities where water is readily available and where vibration from concrete removal is a concern.

Just don’t forget to check and comply with  local regulations regarding water and slurry disposal before you start the process.


  1. Pressure bursting

This is most appropriate for creating cracks in precise sections where concrete is unneeded. To remove the concrete, drill holes and apply expensive grout is applied to the drilled holes.  

Then leave the concrete for a few hours.

It will crack. The concrete can then be removed in portions.


Conclusion

Each technique is suitable for a particular area but note that other techniques may also be applicable. To get the best results, consider enlisting the services of a seasoned service provider like Megasaw Concrete Removal Service.


You Might Also Enjoy..


Preparations in Removing Concrete

Concrete removal preparations

Concrete Removal Health Risks

Concrete demolition, removal and disposal pose health and environmental risk to you and the neighbourhood.

For concrete removal, the risks include:


  1. IRRITATION OF AIRWAYS

This is caused by the dust (airborne particles) produced during concrete removal.

An irritation can exacerbate conditions such as asthma and other disorders of the airways.


  1. HISTOPLASMOSIS

This is a lesser-known infectious disease that is contracted when fungus spores are inhaled. These spores are commonly found in bird droppings and bat excrement.

Histoplasmosis

Concrete demolition work is the trigger that sends the fungus into the air. Inhaling the fungus causes a variety of symptoms, though it primarily affects the lungs.

Histoplasmosis resembles tuberculosis. The disease gets worse over time and will affect other organs. If untreated, this disease can be fatal.


  1. SILICOSIS

Concrete contains silica.

Silicosis

Crystalline silica is quite toxic and causes silicosis, an irreversible and disabling lung condition.  

RELATED


Machine Used in Concrete Removal

Professional concrete removal services typically use hydraulic, petrol and electric driven hand saws and road saws to cut sections of the concrete into smaller manageable blocks.

bobcat concrete removal
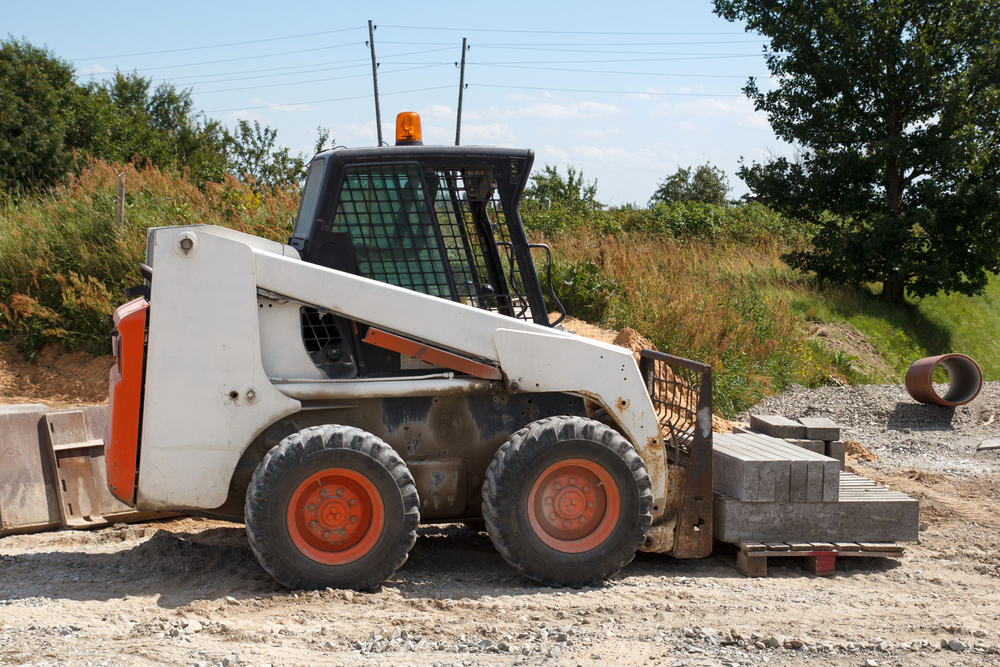
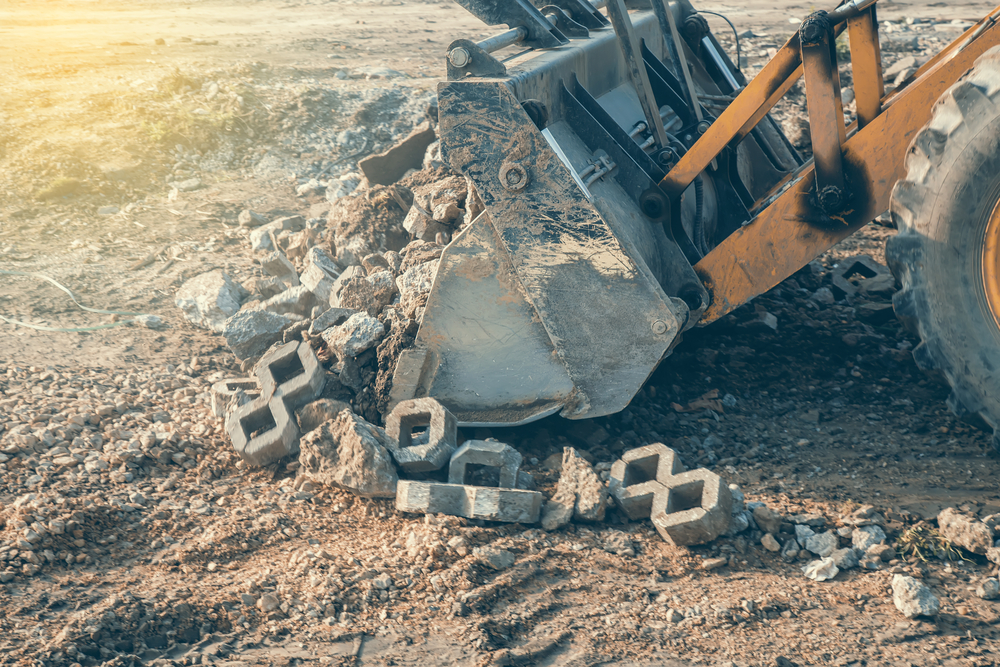
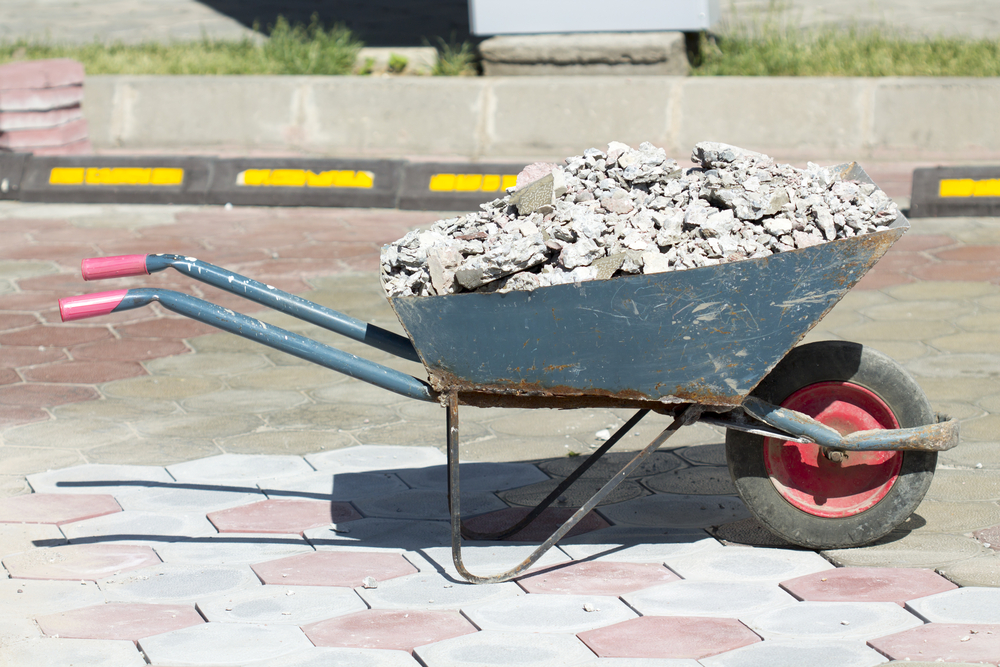
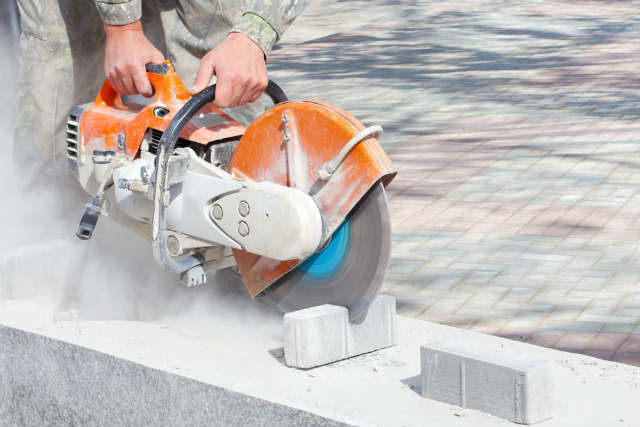
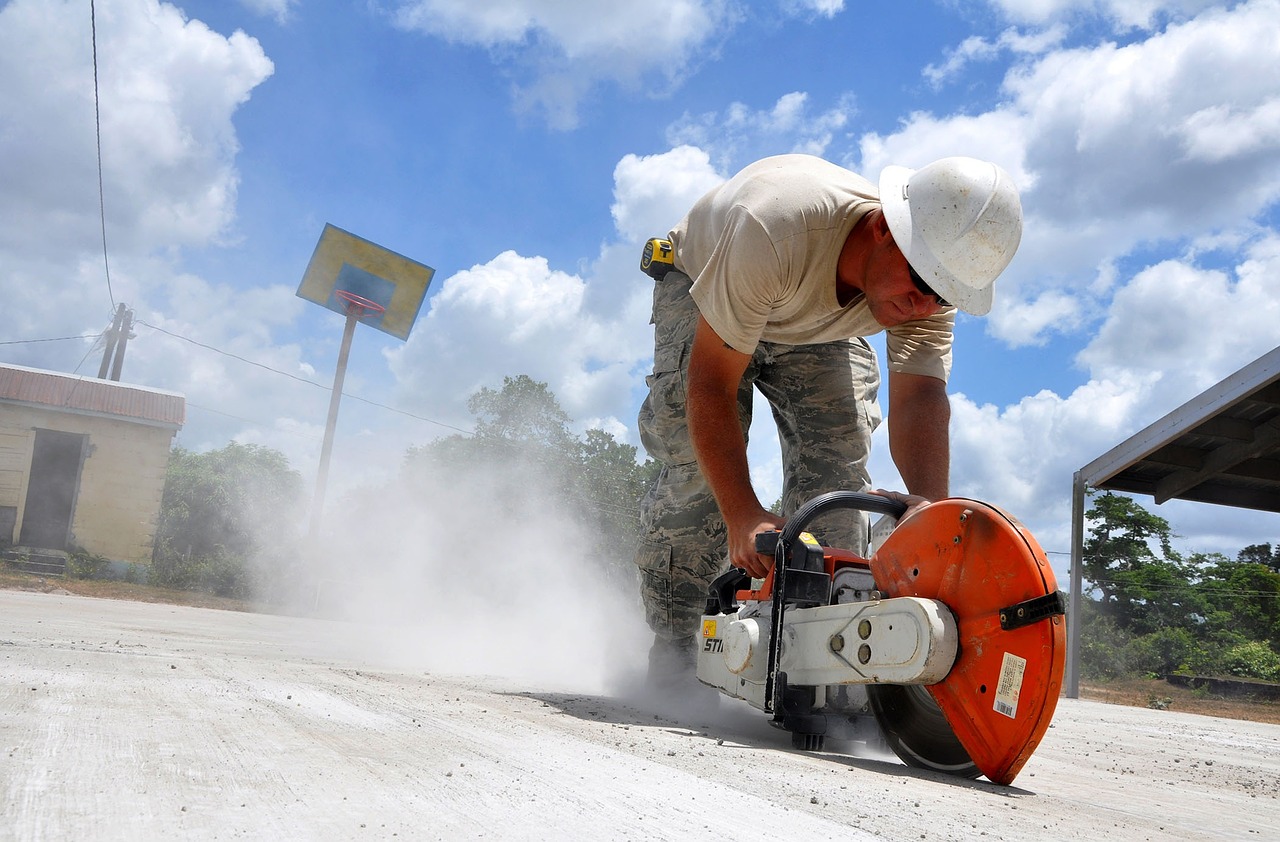
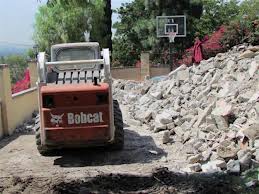
The concrete blocks can then be removed by a bobcat,  a forklift or simply by hand. They are removed from the site in concrete recycle bins. Slurry produced from the removal can be taken off by using a suitable slurry extraction vacuum.

Concrete removal can also be a do-it-yourself kind of work. There are a number of tools you can use to remove concrete on your own. Here are some of them.


  • SLEDGEHAMMER

This would be your concrete demolition weapon.

sledgehammer

Decide whether your sledgehammer will be enough or whether you’ll need a jackhammer by experimenting with a few whacks a few days before your full-scale demolition starts.

If the slab comes out fairly easily then the sledgehammer will be your tool. Otherwise you’ll need to rent a jackhammer.


  • JACKHAMMER

This should be much easier since it uses electricity.

When removing concrete, you would only need the bit with chisel-point tip. This bit makes it easy because it concentrates the jackhammer’s force to a single point, making the concrete crack more quickly.

jackhammer

Caveat: Do not try to crack off large pieces, lest the jackhammer get stuck in the slab. It is therefore best to crack the concrete gradually take small bites with the jackhammer to crack the concrete with ease.


  • BOLT CUTTER

Slabs typically contain reinforcing steel mesh used to resist cracking,  a big headache at the time of concrete removal.

bolt cutter

For this, crack smaller sections of the concrete and snip the wire with a bolt cutter.


Preparations before concrete removal

Anyone can remove concrete, provided he/she is prepared and have the right tools.

Most health risks are brought by dust. But this can be easily countered by wearing the right protective gear.

Here’s what you need to be properly equipped:

  • A heavy duty wheelbarrow

  • 12-lb sledgehammer

  • Pry bar measuring 5 to 6 feet long

  • Bolt cutter

  • A mattock

  • A jackhammer (optional)

The proper gear is composed of the following:

  • A pair of leather gloves

  • Safety glasses

  • Face shield

  • Hearing protection

  • Safety boots

concrete safety gear

You may also need a crew to help you. You can have at least two people break up the concrete while the rest haul away the rubble.

After gathering the necessary equipment and manpower, look to contain flying shrapnel.

One way to do this is by rolling a thick polyethylene over the sidewalk or patio. This will cover the concrete while you hammer it.

Finally, make your disposal plan one week before removing the concrete. One option is enlisting the services of concrete recyclers by searching for ‘recycling services’ on the Internet.

Alternatively, you can rent a trash container for the same. You can find them in the yellow pages.

Provide the waste haulers with the dimensions and thickness of the patio to be removed and let them determine the right container size for your job on their own.

Now that you’re ready, here are some points to note when removing the concrete.

The concrete chunks will typically remain locked together even after breaking them. This will make the surrounding concrete more difficult to break.

Clearing the rubble away after breaking up about 2 to 3 feet portions will make the work much easier.

Above all, ensure you wear a complete protective gear to protect your feet, hands, nostrils, hearing, head and face or eyes from any form of injury. With the right gear, you won’t have to worry about the dangers of demolished concrete.

RELATED


When a DIY isn’t an option…

If instead of doing it yourself, choose to hire a company that has a proven record in concrete removal like Megasaw.


Why Megasaw Concrete Removal Service?

The company has the equipment, expertise and most importantly the experience to handle any concrete cutting and removal project.

More importantly, MegaSaw technicians take additional precautions to protect the surrounding structures from damage during the concrete demolishing and removal process.

Read more of concrete removal service we offered.


Conclusion

Whether you do it yourself or hire a professional concrete removal service, adequate preparation is necessary to ensure the best results and minimal health and environmental harm during concrete removal.


World’s Most Wonderful Concrete Projects

With recent technologies like what we use in concrete cutting and core drilling have found creative ways to use concrete.

And why not? Polished concrete is durable and and beautiful, making it a popular building material. No wonder that even before this rise in popularity, concrete was chosen to be part of the most impressive structures in the world. It has long been the most durable, ubiquitous and flexible building material.

World’s Most Wonderful Concrete Projects

Let’s take a look at the world’s most wonderful concrete projects.

Petronas Towers

Kuala Lumpur, Malaysia: this pair of towers is perhaps the most renowned exemplar of what structural design can make out of concrete.

Petronas Towers are the most famous landmark in Kuala Lumpur, Malaysia. The towers were the tallest buildings in the world last 1998,  before losing that recognition in 2004. They are still the tallest twin towers in the planet though.

Each tower has 88 stories. They are built of reinforced concrete and a facade of glass and steel.

The buildings are erected on thick concrete foundations, supported by the partly limestone and partly soft rock environment. With 104 concrete piles ranging from 197 to 374 feet in depth, the twin towers have the world’s deepest foundations.

This formed a 15-foot thick foundation weighing 35,800 tons and solid enough to hold the two towers in position. This foundation was the world record holder for the largest concrete pour until 2007.

Petronas Towers also feature a number of handsome architectural details such as rounded corners and Islamic art and design, all made of hardened concrete.

Grande Dixence Dam

This is a dam in Switzerland. It’s the world’s tallest gravity dam, made of concrete.

Grande Dixence Dam fuels a total of four power stations supplying about 400,000 households with adequate power.

This Swiss dam measures 935 feet in height and is 2,297 feet long. It also contains just about 212 million cubic feet of concrete.

Hyderabad Metro Rail, India

Still under construction, the Hyderabad Metro Rail project is projected to cost a total of over $2 billion upon its completion.

This elevated rail transport system is a major illustration of contemporary use of reinforced concrete to build a public utility structure.

It measures 46-miles in length and will completely modernize the entire region. The system will feature elevated stations every kilometre. They are expected to handle about 15 million riders.

Chesapeake Bay Bridge

This is one of the most famous bridges in the United States of America. The Bay Bridge connects the eastern and western parts of Maryland State, and bridges the urban and the countryside.

This extensively long over-water structure is made of steel at the top, but features numerous concrete supports through its entire length.

o-CHESAPEAKE-BAY-BRIDGE-facebook.jpg

Image Credit to Huffington Post

Sections of the bridge near the shores are also made of concrete. Chesapeake Bay Bridge includes a suspension span 3,200 feet over the western portion; and a through-truss cantilever to the eastern section.

Pantheon, Rome

The Pantheon, conceivably designed by Apollodorus of Damascus in 126 AD, stands out to date as a chef-d’oeuvre of concrete handicraft.

pantheon.jpg

Image Credit to planetware.com

The building’s Corinthian columns and decorative marble at the lower heights, coupled with the pure circular oculus beaming with patterned lights at the top are a true work of genius.

To top it all, it is unglazed, yet retains and ambience or pure lustre from the bottom up. This is perhaps what makes the whole work of concrete in this structure truly magnificent.

Three Gorges Dam, China

It took 17 years of work and $28 billion to construct the Three Gorges Dam, the world’s largest dam. It is also the most powerful but most expensive hydroelectric project ever built.

ThreeGorgesDam-China2009.jpg

Image Credit to en.wikipedia.org

The amount of concrete that went into this mega dam is virtually incomprehensible. This multibillion dollar project on China’s Yangtze River is 595 feet tall, 131 feet wide, and well over 7,600 feet long.

Bank of London and South America

Italian-Argentinian architect Clorindo Testa used concrete to make something that resembles the skeleton of a dinosaur from the outside. Around it are neo-classical facades that succeed in achieving a civilised look.

ec09c364b10859c88e2a2acdb42d1905.jpg

Image Credit to architizer.com

The structure also features a perforated carapace that lets sunlight into the interior space.

Wrap-up

These are just a fraction of the breathtaking structures made of concrete the world over. They have stood the test of time and some have remained inimitable.

Considering the continually increasing adoption of concrete, we can expect it to be one the biggest things in structural art and design.

Polishing Concrete like a Pro Even on a Budget

how to polish concrete

Polished concrete floors are common nowadays in residential properties.This is unlike before when such floors could only be found in public spaces such as lobbies of office buildings and malls.

One reason for its popularity is because it lasts longer than other types of flooring. While a tiled floor may last 10 to 20 years, a polished concrete floor will serve for more than 100 years.

Flooring-concrete-home-remodeling-ideas.jpg

Plus, they are easy to maintain and are more beautiful. Their durability also means you save money in the long run.

And another way to save money is to polish your concrete floor by yourself. If this is anything you’d consider doing then read on – here’s all the information you need to let you polish like a pro.

Just as any other specialized skill like concrete cutting, core drilling and wire sawing, concrete polishing is a multi-step process that requires the use of the proper tools and equipment to get better results.

To help you get started, here’s an overview of concrete polishing basics.

Knowing The Basics

Concrete polishing can be likened to wood sanding. You need polishing machines fitted with diamond abrasives just like sandpaper.

The rough surface with diamond abrasives is what polishes the concrete surface, bringing out its desired level of smoothness and degree of shine.

Just like in wood sanding, work the surface gradually. Start with an abrasive with a coarser grit and proceed to one with a finer grit to achieve a glossy finish.

Grit refers to the diamond particles on the coarse surface of the tool.

Note that concrete diamond abrasives come in different grits. Use a low-grit abrasive and progress to a high-grit abrasive for a lustrous, mirror-like finish.

A low-grit abrasive is typically a coarser and more aggressive tool.

A higher-grit diamond abrasive such as a 3000 grit tool on the other hand is more even and produces a high shine and glossy look.

RELATED: Key Steps in Concrete Grinding and Polishing

Concrete Polishing Methods

There are two primary methods of polishing concrete: wet and dry polishing methods.

  1. 1. Wet polishing method

This method uses water to cool the diamond abrasives. The water acts as a lubricant and reduces friction between the diamond abrasives and the concrete surface you are polishing.

There is no dust produced in this method and with the lubrication, the polishing plates are likely to have a longer service life.

The diamond segment is often bonded to the grinding disc using a resin that can melt at high temperatures. The water therefore keeps them from melting by controlling their temperatures and increasing their lifespan.

Wet polishing ensures no silica dust (potentially harmful to health) goes into the air.

But this method produces mud from the mixture of the ground concrete dust and the water.

You have to clean up the mud and dispose it in an environmentally sound manner. Wet polishing can therefore be a slower option and may also be messy for interior spaces in homes and retail setups.

  1. 2. Dry polishing method

No water is used in this method. The plates are designed to withstand the high temperatures generated while polishing concrete. Though the technology also allows the disc to withstand the friction, it reduces its lifespan nonetheless.

Dry polishing machine has a vacuum system for dust containment.

This is therefore a more convenient polishing method and increases productivity by reducing downtime for commercial purposes. It’s also convenient for concrete polishing in interior spaces.

The vacuum system however won’t capture 100 percent of the dust produced. Some of the harmful silica dust may remain on the floor and may get into the air as people walk on it.

Now that you know about the wet and dry polishing, you can decide which suits you. Regardless of the method, here’s the procedure to  get the job done.

– Determine the condition of the concrete

Use a MOHS concrete hardness tester.to evaluate the concrete’s surface before you polish.

– Prepare the surface

Before polishing, the concrete’s surface must be clean. Mop it and removing coatings and sealers if any. If it has thick coatings, consider using a 16 or 20 grit diamond abrasive.

As a rule of thumb, the more aggressive the tool, the better and more suitable it is for coating removal.

After removing the coatings, repair the surface by sealing any crack and joint. Use an epoxy or other semi-rigid filler.

But in case the floor has only very light coating or minor blemishes, this phase won’t as necessary or elaborate. You can simply proceed with the initial process of floor grinding.

– Start polishing

For this initial polishing, use of a low-grit abrasive. Start with a 30 or 40 grit metal-bonded diamond.

Then, proceed to grind with an 80 grit metal-bonded diamond abrasive. This will be your initial rough grinding, which prepares the concrete for its final smoothing.

As noted earlier, concrete grinding is a multi-step procedure.  It usually has three or four steps, depending on the condition of the concrete.

– Densify the concrete

It’s helpful to apply a liquid chemical hardener to the concrete after the initial grinding. This will help densify and solidify the surface for a better polish and extra protection from staining and penetration of water.

– Final polish

Use a 100 or 200 grit resin-bond diamond to polish, then progress to polish with a 400 grit resin-bond diamond and finally with an 800 grit resin-bond diamond. Like grinding, polishing is a multi-step process, depending on the condition of the concrete.

You may finish with a 1500- or 3000-grit resin-bond diamond. This will result in a lustrous finish, depending on your desired level of sheen.

– Protect the polished surface

This is optional. You may apply a stain guard to help shield the polished surface. This makes it easier to maintain.

Conclusion

Each concrete polishing job presents a different set of conditions and challenges. Don’t be discouraged. Instead,  deal with it with the end result in mind so you’ll have the desired finish.

How to Choose the Correct Type of Concrete Cutting Blades

concrete cutting blade

The right concrete cutting blade can spell the difference between a cost-effective and efficient job and one with lots of downtime and additional costs.

Thus, you must know what to look for in a blade for your next concrete cutting project.

There are various considerations to make as you seek to get your best blade. But first, get to know the types of diamond blades available in the market.

Here are the options to choose from:

Dry-cutting blades

These are used to cut dry, hard concrete.

Sintered diamond blades are routinely used for dry cutting. They are typically high density alloys of silver and diamond – made by sintering steel cores, diamonds and metal bond materials already put into molds.  

These diamond blades are in two types:

  • Hot-pressed diamond blades

Well alloyed, with high density segments. They have a longer service life.

Marble and Granite Cutting Saw Blades
Image Credit tomade-in-china.com


  • Cold-pressed diamond blades

have low-density diamond segments with high porosity. This feature can improve the cooling condition when the blades are in use. They however have a shorter service life.

Diamond Saw Cutting Blade | MegaSaw
Image Credit to made-in-china.com

Sintered diamond blades can cut marble, granite, concrete, asphalt, ceramics and other dry building materials.

Note: Some sintered diamond blades such as the continuous rim diamond blades can only be used in wet cutting.  


RELATED ARTICLES:


Wet-cutting blades

Water must be used to cool the blades, in contrast to dry-cutting blades that need no cooling. These are used to cut green concrete.

Silver brazed diamond saw blades are typically used in wet concrete cutting. The diamond segment of a silver brazed diamond blade does not have a transition layer.

They are brazed directly to the steel cores using silver-based brazing films which normally contain 40 – 50 percent silver.

As such, silver brazed diamond blades cannot be used in dry cutting. This is because the high temperatures generated in the dry cutting can melt the silver solder, causing the diamond segments to fall off the blade.


Laser welded diamond blades

These can be used in both wet and dry cutting. They are made by fusing the diamond segments and steel core by laser welding.

Cutting Saw Blades | Megasaw
Image Credit to Diamond King Tools

The diamond segment-steel core junction is melted to form a connection that can withstand high temperatures produced in dry cutting.

It’s still however recommended that laser welded diamond blades be used with lots of water, (wet-cutting) because dry cutting can cause the diamond segment or steel core to wear off and break.


Things to consider when choosing concrete cutting blades

The blade components

Armed with an understanding of how a diamond blade works, it becomes easy to pick a blade with the right cutting quality and characteristics that suit your needs. Here are the basic blade components and what to look for in each component:

Cutting Concrete | Megasaw


  • The diamond crystals

Are the sharp cutting teeth that slice through concrete as the blade rotates. The diamonds at the surface become dull with time as you use them. The matrix gradually sheds away worn out diamond crystals to expose new, sharp diamonds embedded within it.


  • The matrix

The metal bond that holds the sharp diamond crystals in place until they wear off. The harder the matrix the longer it takes for the blade to wear away.


  • The metal core

A steel disc that was precision engineered with a segmented rim. This holds the diamonds.


  • The weld

Attaches the diamond cutting segments to the core. Can be laser or solder weld.

For soft, abrasive materials like green concrete, use a blade with a hard metal bond so the diamonds exposed at the surface are fully utilised before they get shed off.

For hard, solid and non-abrasive concrete, use a blade with soft bonds to allow the matrix to get rid of worn out diamond particles and ensure that sharp new diamonds get exposed with ease.


Characteristics of the concrete

The choice of blade depends on  material you want to cut. Consider characteristics such as:

  • The hardness of the aggregate
  • The type of sand
  • The compressive strength

Concrete with a compressive strength below 3,000 psi is considered soft. On the other hand, concrete with a strength of 6,000 psi and above is hard.

Saw Cutting Concrete | Megasaw

Be sure to use a blade with a hard bond to cut soft concrete. When cutting  concrete with high psi (hard) however, use a blade with a soft bond.

This is because high-psi compressive strength, hard aggregate and hard sand tend to dull the diamond particles quickly.  Thus, a softer bond will allow new diamonds on the blade to be exposed as quickly as needed for better work.


Timing of the cut

Green (freshly applied) concrete is softer. Use a blade with strong bonds on the matrix so you can maximise the use of the exposed diamond particles before they are eroded.

Newly Set Concrete Cutting | MegaSaw

This would apply if you cut the concrete approximately 1 to 2 hours after finishing.

Beyond that time, the concrete would already be hard. You’d want to use a soft-bonded diamond blade to cut it.


Cost of the blade

Like any product, manufacturers offer diamond blades at various prices depending on the quality. Options range from basic economy to professional or top-of-the-range versions.

They differ primarily on the diamond content, the most important part of the blade. The higher the diamond concentration the better the quality and the higher the amount you’ll typically pay.

In considering the cost, look at what’s important to you. Is it the initial savings from buying an inexpensive blade or the value given by a more expensive blade in the long run?

For small cutting jobs that involve little run on the blade, you’ll likely save money by buying the economy blade. Jobs that involve frequent or long hours of use however make top-quality blade more cost effective in the long run.


Conclusion

If the quality-cost consideration of buying your own blade shows you would be paying more that you are willing to, it will be better to hire a professional concrete cutting contractor like MegaSaw. By this, you avoid the hassle and unexpected additional costs.

Posts navigation