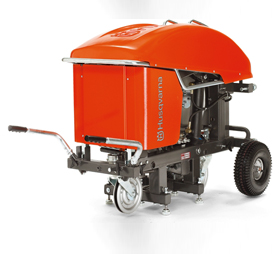
Wire saws, which are usually complimented with a high-performance hydraulic unit, are exceptionally powerful and easy to use, which can handle bulk jobs efficiently. Simultaneously, it comes in a compact and portable design, which is easier to transport from one place to another. Top-notch wire saws can be used for a wide spectrum of applications, both on the ground and mounted on walls. Here is a quick guide on how to prepare a wire saw for operation:
Preparing The Saw:
- Determine your cutting needs comprehensively before you assemble the wire saw. This is important to ensure that the saw can be operated with ease.
- The key feature of many top-quality wire saws is that they can be assembled for making either vertical or horizontal cuts. If you are looking to make vertical cuts, assemble the saw in standing position. When the cut is to be made on the floor or at floor height, it can be assembled horizontally. Often, it might be necessary to drill holes to allow the wire to go through the material that is to be cut.
- In front of the planned cut position, place the saw appropriately. Make small adjustments in the position and then secure it by screwing the anchor bolt down. When you have anchored the saw onto the floor, the adjuster feet needs to be screwed down so that it stands firmly. If the wire saw is not properly secured, it can overturn when the material, which supports the adjuster feet pair, is cut through.
Fit Idler Wheels
 Wire saws often come with idler wheels, which can be fitted to the machine to assist the precision cutting process. Use of these wheels reduces the number of sharp corners that the wire needs to be pulled around, thus, resulting in less wear and tear on the wire. It also makes the cutting process easier. The wheels also enable the operator to guide the wire in different directions without the need of actually moving the saw unit. Once you have finished the cut, the idler wheels can be used in capturing the wire. Make sure that you position the saw appropriately so that you can stand and operate on the cutter, without the risk of being hit by a broken wire.
Connect the Power Pack
Once you have assembled the saw appropriately, connect it to the hydraulic unit. Here are some tips on how to connect the power pack to the saw:
- First, connect the incoming power cable.
- Next, connect the incoming water hose of the wire saw to the water coupling located at the bottom of the motor front on the hydraulic unit.
- Using the cable provided, connect the remote control and tighten the cable connector screws appropriately.
- If the machine comes with a radio, connect the radio antenna instead of the cable, by inserting it into the same socket as that of the cable.
- Check if the emergency stop power on the hydraulic unit and the remote control have been triggered or not; simply by moving them in the direction of the arrow.
- Confirm what the display shows by pressing the membrane key ‘OK’.
- As provided in the instructions, set the pressure reduction block on the power pack
- Next, set the hydraulic hoses and water on the power pack and lock the couplings by turning the sleeve so that the slot moves away from the ball
- Now connect the hydraulic hoses on the wire saw in the same manner as on the power pack
- Connect the water hose to the water coupling located on the saw unit
- Confirm that the hoses are connected appropriately
Thread the Wire
Next, thread the wire by following the instructions as provided by the wire saw and hydraulic unit.
Place Cooling Water
Attach the water spears to the outlets provided in the wire saw. The thread wire takes the water into the cut, facilitating concrete dust binding and ensuring that the wire is cooled more efficiently.
